
Nosto enhances the customer experience by providing unique recommendations informed by previous interactions with your Zoey store. We recommend Nosto for capturing relevant customer information, leading to increased conversion and revenue.
| 1 | Why Nosto? |
| 2 | Enable Nosto |
| 3 | Connect Nosto to Zoey |
| 4 | Learn more about Nosto |
Why Nosto?
- Automate a personalized experience for every customer that visits your store.
- Display what other customers viewed, searched, and purchased.
- Simple customization of the look, feel and function of your recommendations.
- Send triggered email based on customer behavior such as abandoned carts and related products to recent purchases.
- Sophisticated, straight forward analytics to understand how customers interact with your store.
Step 1 - Enable Nosto
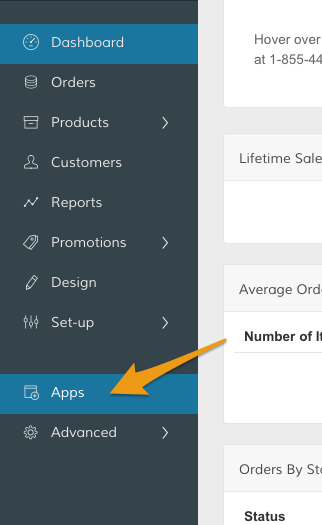
In your Control Panel, click Apps.
Then, in the Apps page, scroll to Nosto. In the Enable Nosto section, click Manage.
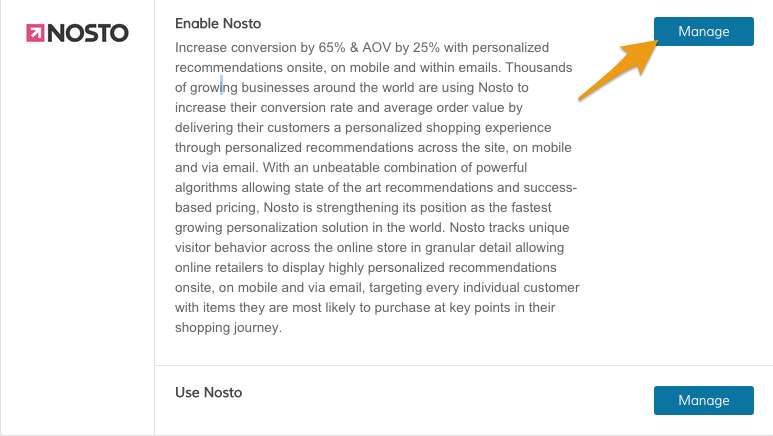
In the Enable Nosto section, click Manage from the menu.
Note: After enabling Nosto, you can visit your integration from the Nosto Apps section by clicking the Manage icon within Use Nosto.
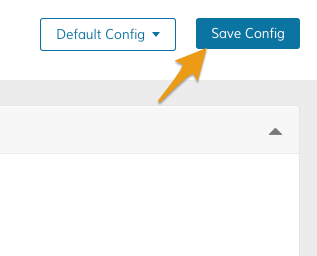
Click Save Config.
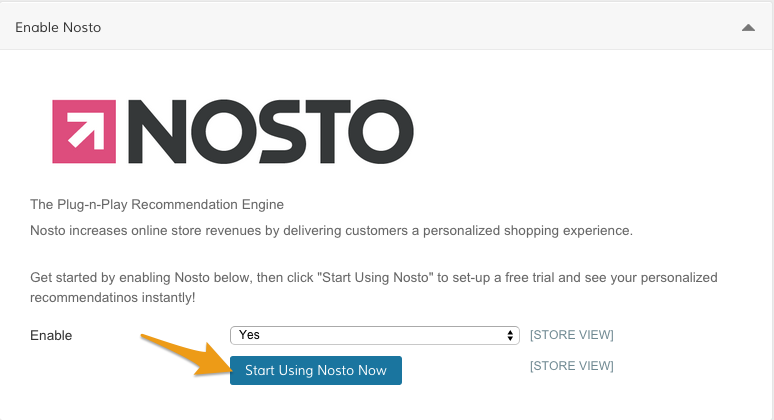
Click Start Using Nosto Now to finish enabling Nosto.
Step 2 - Connect Nosto to Zoey
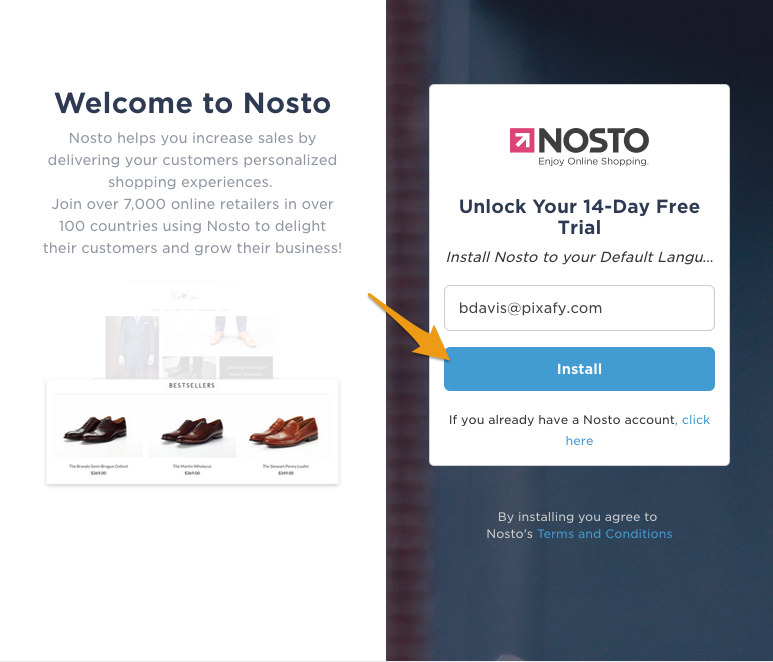
On your Nosto integration page, you can create a new trial by entering in your email and clicking Install.
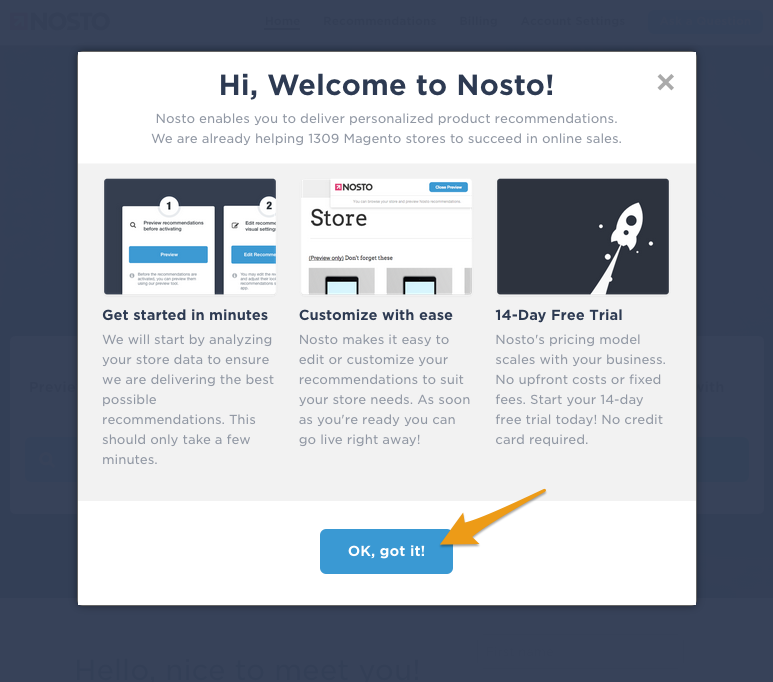
You'll receive a brief introduction to some of Nosto's core features. Click Nosto's OK, got it! icon to continue.
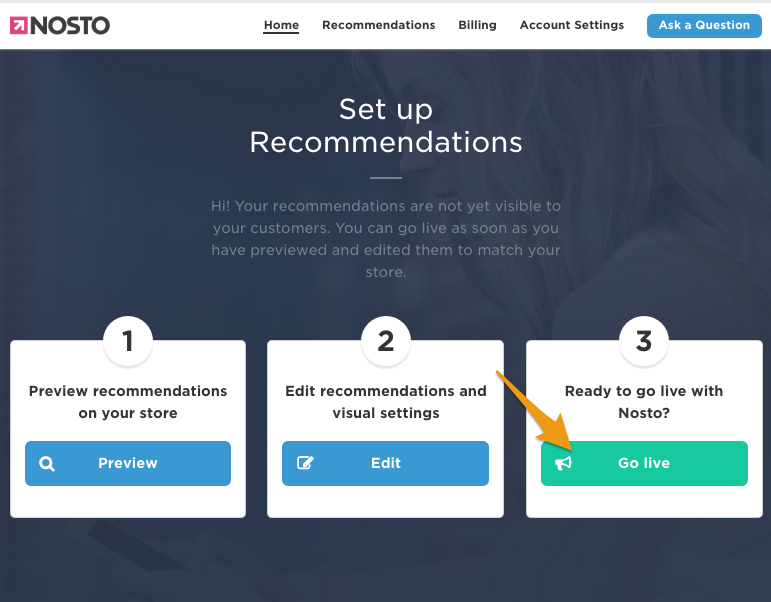
You can customize the look and feel of your recommendations directly from the Nosto integration in Zoey! When you're ready to have Nosto's tool display within your store, click Go live.
Note: You can manage your analytics, triggered email, and additional tools by logging into your Nosto account from their website.
Learn more about Nosto
Nosto has an extensive knowledge base with helpful support articles on managing your Nosto account. If you have any questions about using Nosto, you can contact their support team from here.
Comments
0 comments
Please sign in to leave a comment.