Authorize.Net is a leading transaction gateway known for secure, simplified transactions. They accept all major credit cards, including digital services like Apple Pay, PayPal, and Visa Checkout, making it a great one-stop solution for your online checkout.
| 1 | Before you begin |
| 2 | Add Authorize.net to Payment Methods |
| 3 | Enter API Login ID and Transaction Key |
| 4 | Enable and configure Authorize.net settings |
| 5 | Save |
| 6 | Use Authorize.net Direct Post |
Before you begin
- We recommend creating an Authorize.Net account before setting up your payment gateway on Zoey. You can sign up here.
- If you are updating your Authorize.net Gateway URL, we explain how to do so here.
Step 1 - Add Authorize.Net to Payment Methods
In your Control Panel, hover over Set-up and select Payment.
Scroll down and select Authorize.Net. Then, click Add Payments.
When you finish, scroll to the Authorize.Net section and click Set-up.

Step 2 - Enter API Login ID and Transaction Key
From your Authorize.Net account, copy your API Login ID and Transaction Key. Then, from Set-up > Payment > Authorize.net, paste your information into the corresponding fields:
![]()
Note: Authorize.Net explains how to obtain your API information.
Step 3 - Enable and configure your Authorize.Net settings
First, from the Enabled field, select Yes.
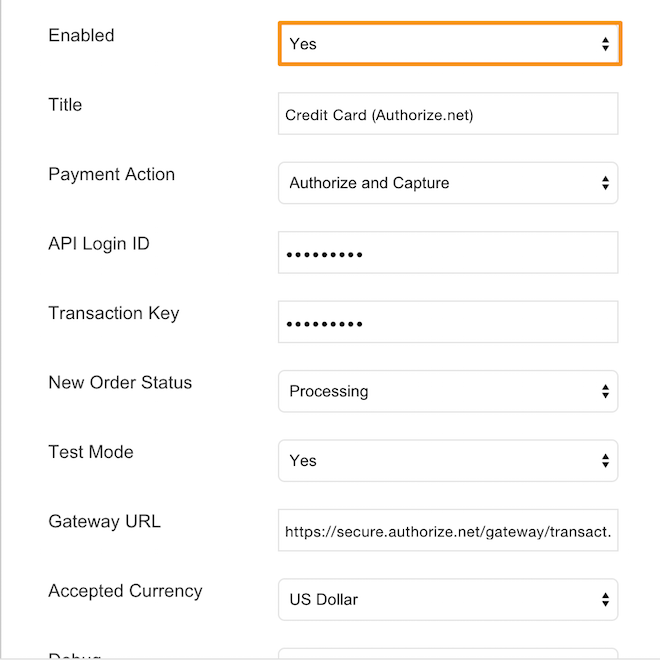
Then configure the rest of your Authorize.Net settings. Here are a few we recommend reviewing before you finish:
- Title - Select a name for your payment gateway that appears on the frontend.
- Payment Action - Select Authorize to approve a purchase but receive payment at your discretion. Select Authorize and Capture to immediately receive payment from customers when they purchase via Authorize.net.
- New Order Status - Select a status for each order paid through Authorize.Net.
- Test Mode - Set to Yes to test the payment gateway before using it on your live store. Select No when you're ready for Authorize.Net to go live.
- Accepted Currency - Select an accepted currency for payments via Authorize.net
- Email Customer - Select Yes to send an email to customers after completing checkout.
- Merchant's Email - Enter your email here to receive a notification from Authorize.net after your customer complete's a transaction.
- Credit Card Types - Select credit cards allowed to purchase via Authorize.net. Hold Command (Mac) or CTRL (PC) to select multiple options.
- Credit Card Verification - Select Yes to require verification.
- Payment from Applicable Countries - Select All Allowed Countries to place no country restriction on using Authorize.Net. Select Specific Countries to restrict payment to individual countries. Hold Command (Mac) or CTRL (PC) to select multiple options.
- Minimum and Maximum Order Total - Set the minimum and maximum currency value for orders purchased through Authorize.Net.
- Sort Order - Enter a numeric value to determine the order your payment option appears.
- 3D Secure Validation - Select Yes to enable 3D Secure credit card validation. You can read more about 3D Secure setup here.
Step 4 - Save
When you finish, click Save.

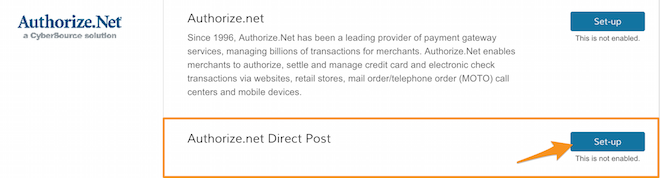
Step 5 - Use Authorize.Net Direct Post (optional)
Authorize.Net's Direct Post is a great way to have a synchronized transaction process done securely within your store. When payments are made using the Direct Post method, the Authorize.Net gateway handles all steps in the transaction process; such as payment data collection, data submission, and response to the customer, while the customer remains in your store.
Creating this method is very similar to our standard Authorize.Net setup:
- From Set-up > Payments, scroll down to Authorize. Within the Direct Post subsection, click Set-up.
- Enter your API Login ID and Transaction Key, found in your account, per Step 2 of our guide.
- Enable and configure your Direct Post settings, per Step 3 of our guide.
- Save.
Comments
0 comments
Please sign in to leave a comment.