
An attribute is a characteristic or trait customers can use to navigate your catalog. You can choose between basic variants like size and color, or create new ones depending on the nature of your product! There are 66 preset attributes available when you start your Zoey store, but you can create as many as you need to effectively describe your products.
Attributes are the foundation to building highly customizable products -- use them to give customers unique choices when shopping on your store.
| 1 | Visit attribute settings |
| 2 | Add attribute |
| 3 | Configure attribute properties |
| 4 | Configure frontend properties |
| 5 | Configure manage titles |
| 6 | Add attribute options |
| 7 | Save and refresh |
Step 1 - Visit attribute settings
In your Control Panel, hover over Products and select Attributes.
Step 2 - Add attribute
From the Manage Product Attributes page, click Add New Attribute.
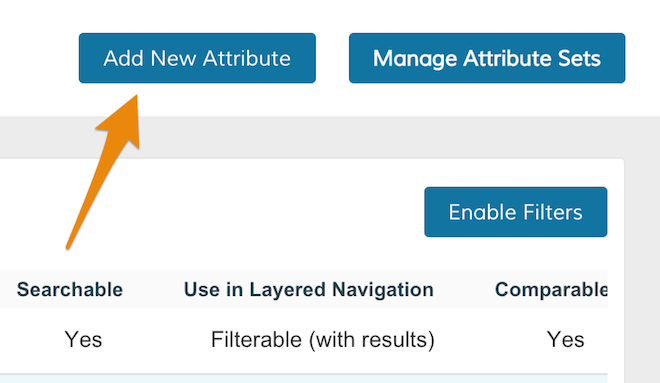
Then, you can edit your attribute settings.
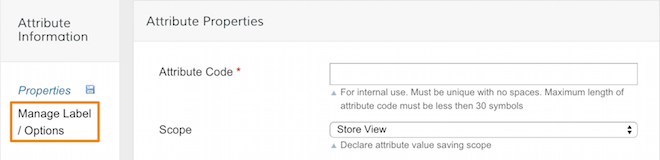
Step 3 - Configure attribute properties
Determine the main settings of your attribute.
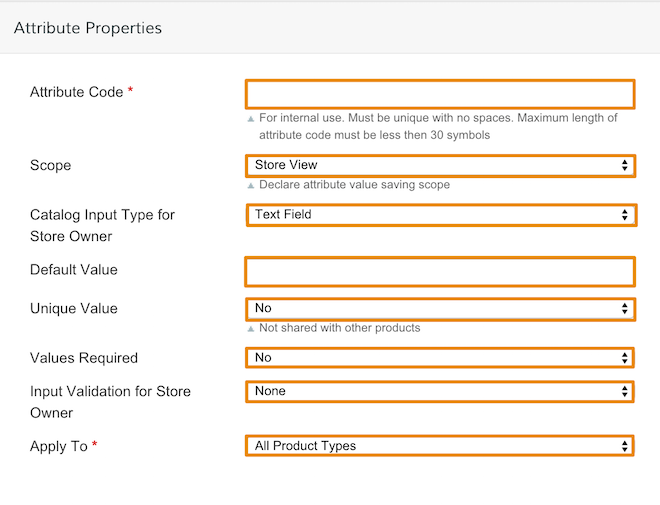
- Attribute Code - Created for internal use. It must be unique with no spaces (e.g. "shirt_sizes" not "shirt sizes" and less then 30 symbols.
- Scope - Select the range of attributes in relation to your store. You can choose the attribute to display within a Store View, a Website or Global.
Note: We recommend using Global so your attribute can be used with configurable products. The Website option will be fully functional when we offer multisite capabilities - coming soon!
- Catalog Input Type for Store Owner - Select the input control of the attribute when store administrators input data.
- Text Field
- Text Area
- Date
- Yes/No
- Multiple Select
- Dropdown
- Price
- Media Image
- Fixed Product Tax
Note: Select Text Field or Text Area to define a default value.
- Unique Value - Select Yes if only one product will use the attribute.
- Value Required - Select Yes to require a value to be entered in the field before saving.
- Apply To - Choose the product type associated with the attribute. Choosing Selected Product Types will open a list of products you can choose from. We recommend selecting All Product Types unless the attribute is specifically for a distinct product type such as Virtual or Downloadable products.
Note: The Attribute Code and Catalog Input Type for Store Owner cannot be edited after you save the attribute.
Note: Hold CTRL (PC) or Command (Mac) while selecting product types to choose multiple types.
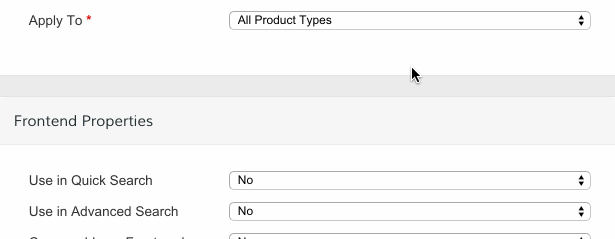
Step 4 - Configure frontend properties
Scroll down to edit how customers interact with your attribute on the frontend.

- Use in Quick Search - Select Yes to display the attribute when customers use Quick Search. It's located in the top-right hand corner of your store frontend.
- Use in Advanced Search - Select Yes to display the attribute when customers use advanced search.
- Comparable in Front-end - Select Yes to use the attribute in a product comparison with other products that share this attribute.
- Use in Search Results for Layered Navigation - Select Yes to include the attribute in the layered navigation for search results.
- Use for Promo Rule Conditions - Select yes to make your attribute available when customers use price rules.
- Top Products - Enter a numeric value to determine the position of your attribute in layered navigation in relation to other filterable attributes.
- Allow HTML Tags on Frontend - Select Yes to format the attribute value with HTML.
- Visible on Product View Page on Frontend - Select Yes to display attribute on your product page's Additional Information tab
- Used in Product Listing - Select Yes to include your attribute in product summaries that appear in catalog listings.
- Used in Sorting in Product Listing - Select Yes to include your attribute as a sorting option for catalog listings.
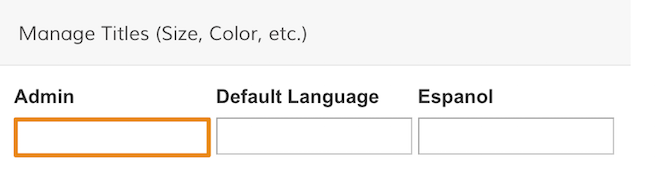
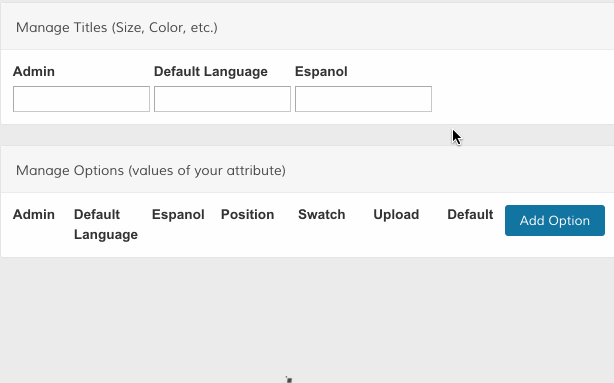
Step 5 - Configure manage titles
Under the Attribute Information, select Manage Label/Options. This will display your Manage Title settings.
Then, enter in your settings under Manage Titles. Enter a descriptive label in Admin to identify the field. If you have multiple store views, you can enter in translations for each view.
Step 6 - Add attribute options
If you set the Catalog Input Type For Store Owner to Dropdown (see Step 3), you can configure the options within that dropdown. Options allow you to choose different variants of your attribute. For example, if your attribute is color, you can create red, yellow, and green options. If your attribute is size, you can create small, medium or large.
Click Add Option to enter new values.
You can add a descriptive label in Admin, a translation under fields that correspond with your store views, and the order of your option under Position. If you're creating or editing options for a color attribute, you can add a sample of the color under Swatch. This allows customers to preview the color before making a selection.
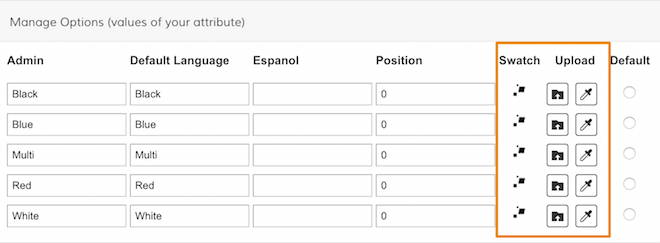
Note: We explain how to configure swatches in detail here.
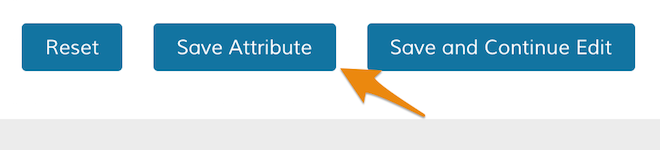
Step 7 - Save and refresh
When you finish creating your attribute, click Save Attribute.
As you create attributes for your products, assign them to Attribute Sets to place them with your products. The attributes that you combine into an Attribute Set are used as templates when creating new products.
Comments
0 comments
Please sign in to leave a comment.