
Categories are used to organize products into logical groups on unique pages. This allows merchants and customers to easily find a set of closely related products on a filterable page.
Creating a set of categories is one of the first steps in getting your store ready, and can be done to create a helpful framework for your products.
Note: If you have started using one of our migration tools you may already have a few categories imported from your old store.
Before you begin
The following terms are important to understand when working on your categories.
- Root Category - The highest level of categorization in Zoey's hierarchy. All other categories are organized within your root category. They are a placeholder for your store in its entirety and do not display in the frontend of your store.
- Subcategory - Each subcategory aligns with an overarching department within your store. We recommend keeping these categories broad (e.g. "Shirts", not "Green and Red Striped Polos") because customers can use layered navigation to find specific items.
Note: We explain the differences between root categories and subcategories in detail here.
Step 1 - Visit Categories page
In your Control Panel, hover your cursor over Products and select Categories.
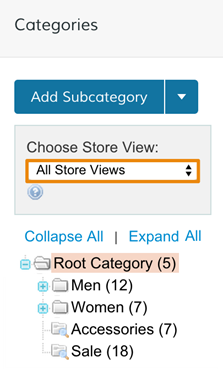
Step 2 - Select a Category location
If you have more than one language enabled, you may need to select a Store View from the Choose Store View menu. If you want your Category to appear across every view or language, select All Store Views.
Subcategories can exist as navigation links that display as standalone items, or they can display as a collection of links within a navigation drop-down.
- To place your new category as an independent link on your navigation, click on your Root Category.
- To have your new category appear inside another Subcategory, click the existing category.
Remember, you can always reorganize these later!
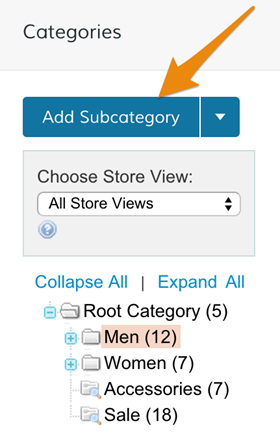
Step 3 - Add Subcategory
Once you have chosen where this new category will live, click Add Subcategory.
Note: You can click the arrow next to Add Subcategory to add a Root Category. Only one Root Category can be used per Zoey store at this time.
After selecting your Category, you will see a series of tabs containing related settings that you can customize.
General Settings
Create a name, description, and add an image for your Category.
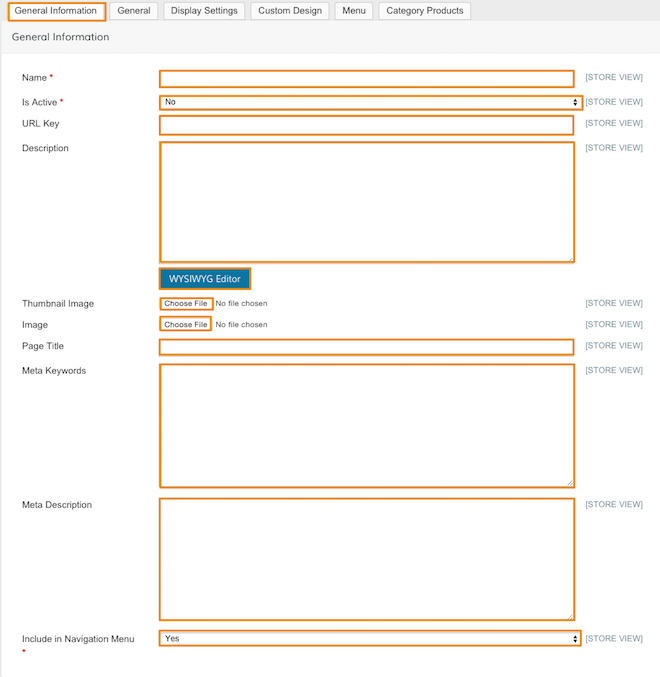
- Name - Create a name for your Category. This name will appear in your navigation.
- Is Active - Select Yes to make the Category page accessible. Select No to make the Category page inactive.
- URL Key - Create a unique URL by entering a descriptive word or phrase for your Category (e.g. "mysite.com/"). For example, if you want your category URL to be mysite.com/sale, enter "sale" in the URL key field.
- Thumbnail image - Coming soon with our updated design tools!
- Description - Add text that will appear below the Category name in your frontend. Description content is entered in HTML by default. Click the Use WYSIWYG - to open the WYSIWYG editor for easier content customization.
- Image - Upload an image or banner that appears at the top of your Category page
- Page Title - Also known as the Meta Title, this will be shown on search engines and in your customer's browser when they visit or bookmark the page. We recommend a unique and descriptive title, 128 characters maximum to optimize visibility on search engines.
- Meta Keywords - Enter short, comma separated words relevant to the Category for search engines.
- Meta Description - Enter a short description of the page, written in complete sentences for search engines to display when listing the page in search results.
- Include in Navigation Menu - Select Yes to display in the Navigation menu. Select No to have your page hidden from the navigation.
Display Settings
Customize some of the design options of this category page.
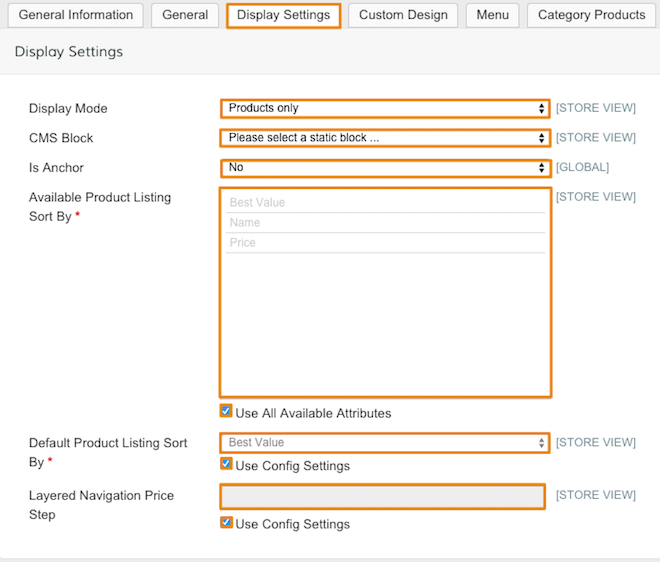
- Display Mode - Include a static block in your product display, useful for creating custom designed content. The static block can be created from Design > Content.
- Products only - Display your Category's products alone.
- Static Block only - Display a static block to create custom designed content. (Only available in Classic Design Tools)
- Static Block and Products - Display your products with a custom static block. (Only available in Classic Design Tools)
- Static Block - Select from a list of static blocks. This option is only shown if Static Block only or Static Block and Products is selected from Display Mode. (Only available in Classic Design Tools)
- Is Anchor - Select Yes to allow your Category to inherit products from its sub-categories. This also enables layered navigation in the left column of the Category page. Anchoring a Category is useful for helping customers quickly filter through your product attributes when browsing products.
- Available Product Listing Sort By. Select which sorting options are available. The Use All Available Attributes checkbox is selected at default.
- Default Product Listing Sort By - Select how products in the Category page are sorted when a customer visits your store. Uncheck Use Config Settings to manually set your sorting default.
- Layered Navigation Price Steps - Set a numeric value used for the amount of each price filter. To choose the default set in your Config, check Use Config Settings. Filter Price Step is calculated automatically.
Custom Design
Here you can find advanced settings on customizing your page design.
Note: Zoey does not support edits to these configurations.
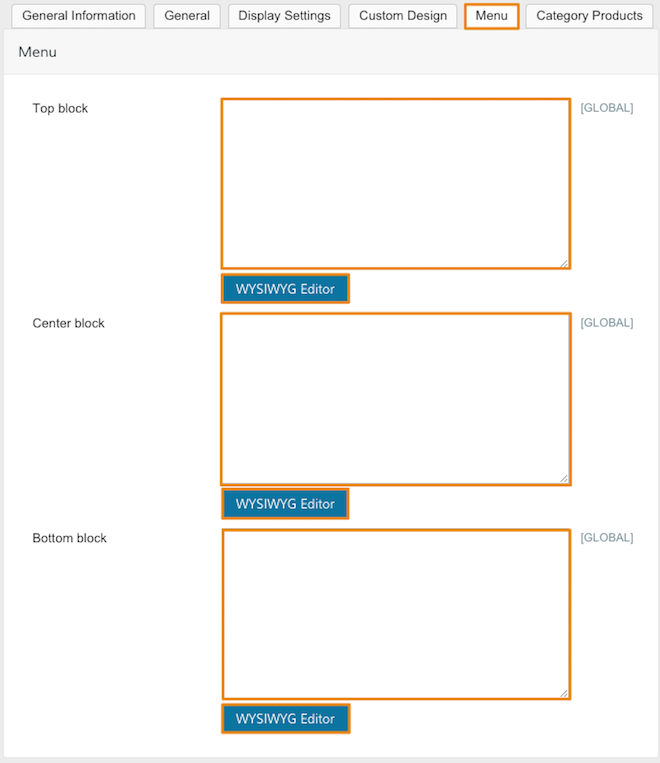
Menu
Add custom banner or text to your navigation's drop-down menu. You can add content to the right of your drop-downs, and align them with the top, center, or bottom of your menu.
Note: Menu banners are only available on specific themes and layouts.
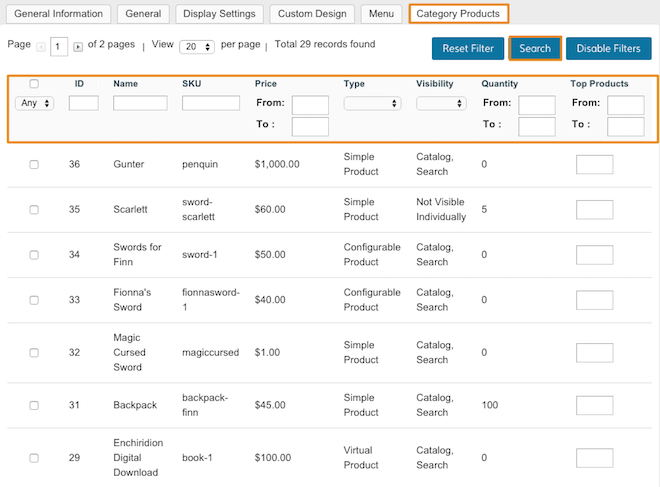
Category Products
Add products to your Category, and set a default sort order. You can use the highlighted fields to filter through your products for quicker browsing.
Step 4 - Save and refresh
After completing your configurations, click Save Category from the top right corner. Then, in your Control Panel, hover your cursor over Advanced and select Refresh Your Store.
Step 5 - Edit an existing category (optional)
To edit an existing category, select it from the Categories menu. The configuration fields mentioned in Step 3 will display the information for the selected Category.
Note: For quicker category browsing, you can quickly view all your categories by clicking Expand All. You can hide your sub categories by clicking Collapse All.
How do I translate my categories into different languages?
Zoey allows you to display your categories differently based on the store view. You can do this by updating the category information in each language associated with a store view. Update the language by:
- Create your category (Step 2).
- Save your category (Step 4).
- Switch your Store Scope to the language you wish to create a translation.
- Enter your category name and information translation.
Note: We explain how to change your Store Scope here.
Comments
0 comments
Please sign in to leave a comment.