
-
Custom Options provide an easy way to offer a selection of product variations to your customer. They have the advantage that you don't have to create separate products as you would do for Configurable Products and their associated products. The limitations however, are that you cannot track inventory based on any variation, and that a product with Custom Options cannot be used in a one-to-many relationship with a configurable, grouped, or bundle product. Custom Options are a good solution if your inventory needs are simple.
Step 1 - Creating Custom OptionsFrom the Control Panel, select Products > Products List and click on the product you wish to edit.
From the left hand Navigation select Custom Options. This will open the page to set up the different variations.
Step 2 - Adding New Options
In the upper-right corner, click the Add New Option button. Then, complete the following fields:
- Enter a Title to be used as a label for this option.
- Select the Input Type for this field, such as text or dropdown.
- Set Is Required to “Yes,” if the customer must make an entry in this field to continue, if they do not set it to "No".
- To control the sequence of options, enter a number in the Sort Order field to determine the sequence of this option when listed with other options. The number 1 puts this option at the list. If you want this to display alphabetically, leave the Sort Order blank or enter "0"
Step 3 - Adding New Rows
Click the Add New Row button to add a row for the product variation. Then, complete the following:
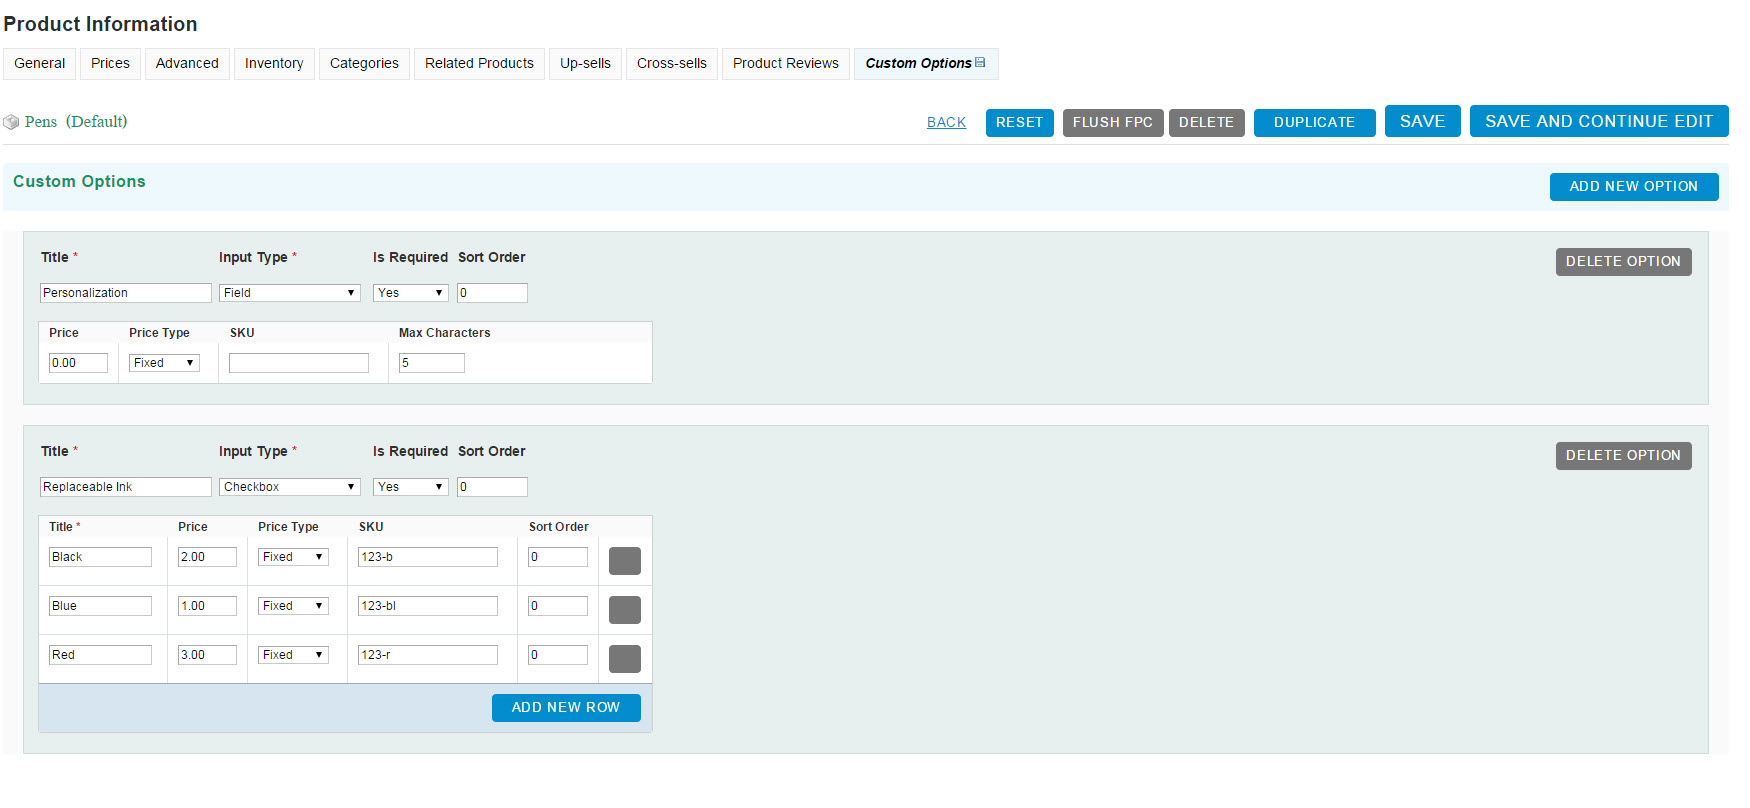
- Enter a Title to be used as a label for this variation.
- If applicable, enter the Price of the variation as a markup or markdown from the base price of the product.
- Set Price Type to one of the following:
- Fixed: Sets the price of the option to a fixed amount, such as $1.
- Percentage: Sets the price of the option to a percentage of the base price of the product, such as 10%.
- Enter the SKU for the option. The option SKU is a suffix that is added to the SKU of the main product record.
- To control the sequence of options, enter a number in the Sort Order field to determine the sequence of this option when listed with other options. The number 1 puts this option at the list.
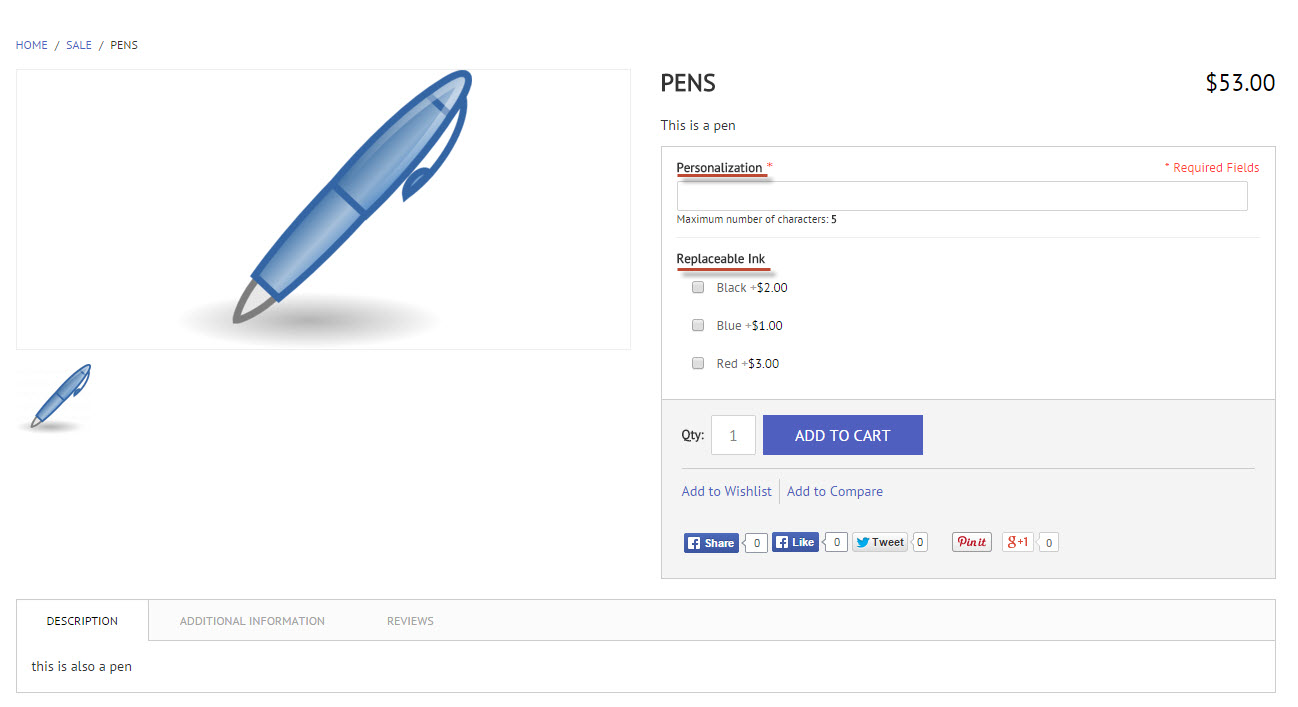
When complete, click the Save button and you're all set! Let's look at the front end to see what you've done:
Comments
0 comments
Please sign in to leave a comment.