
Whether you are just starting out or building your existing catalog, adding a product to Zoey is fast and simple! This guide walks through Simple product creation- a perfect starting point for learning about building other product types.
| 1 | Visit Product List page |
| 2 | Choose product type |
| 3 | Assign an attribute set (optional) |
| 4 | Edit General Information |
| 5 | Save and refresh |
| 6 | Add additional product information |
| 7 | Add product images (optional) |
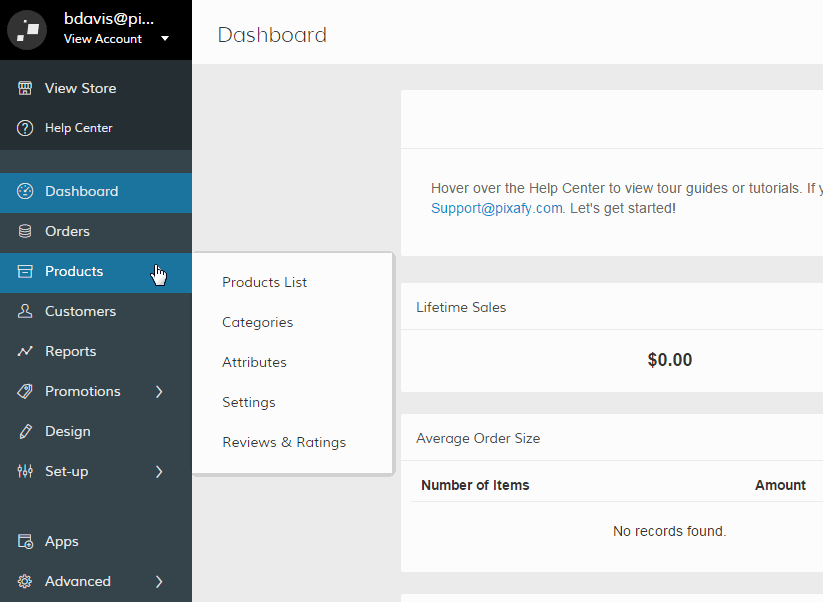
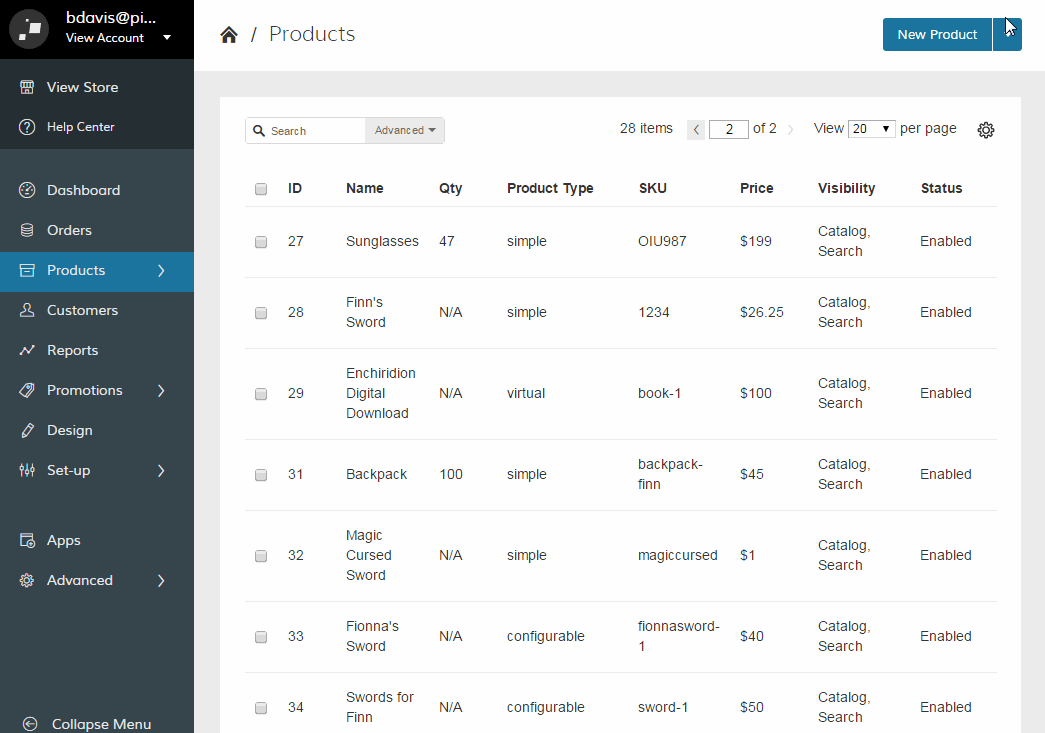
Step 1 - Visit Product List page
From your Control Panel, hover your cursor over Products and select Product List. You will see a list of existing products and their respective attributes.
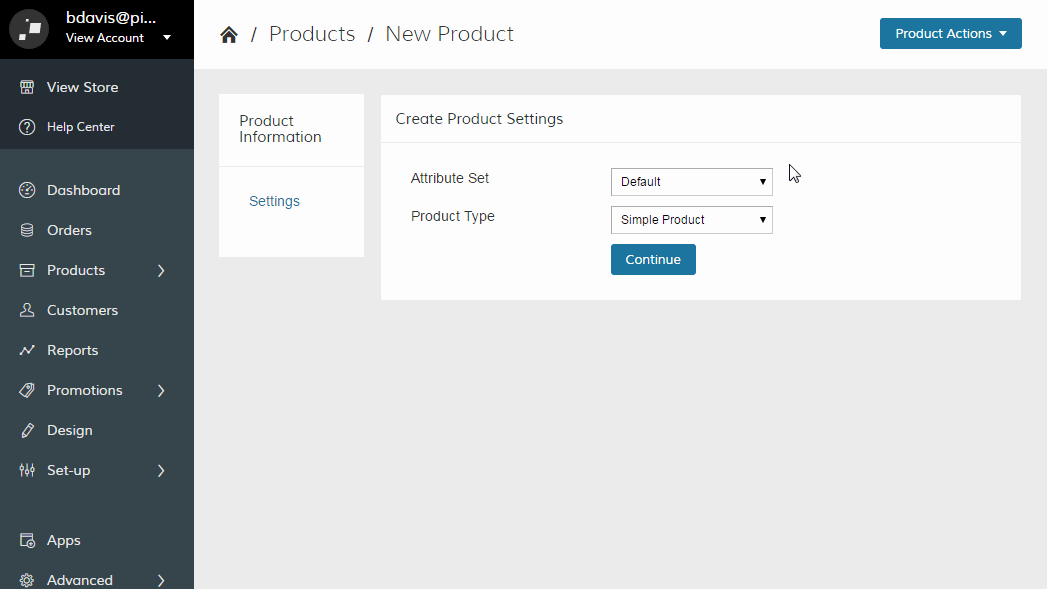
Step 2 - Choose product type
Zoey allows you to create six different product types. They can be selected from the dropdown menu in the top right corner. Click the arrow next to New Products to select a specific product type.
Note: Virtual Products and Downloadable Products are available on Business and Premium subscriptions. If you're using a trial, you can try them out! You can learn more about Product Types here.
If you would like to use our Simple Product, the default product type, click New Product.
![]()
Step 3 - Assign an attribute set (optional)
Depending on the nature and variety of your products, you may need to create custom attributes to match the need of your product. If you are comfortable with the default attributes listed with your current New Product, you can begin editing the General Information. If not, select an attribute set that corresponds with your product. If you have created custom attribute sets, you'll be prompted to select one of your sets.
Note: If you know your product will need a separate attribute set, you must set this information before saving your product. We explain how to create attribute sets here.
Step 4 - Edit General Information
Under the General Information section of your Product page, fill out all required fields. Required fields are marked by red asterisks.

Note: Different products types have varying info fields. For example, a downloadable product (.pdf, mp3, etc) won't have a weight.
Step 5 - Save and refresh
After you have completed all the General Information fields, click the dropdown menu in the top right corner and click Save.

Then, in your Control Panel, hover your cursor over Advanced and click Refresh.
Step 6 - Add additional product information (optional)
After you save your product, you can further customize your product by including additional information. You can add images, configure shipping services, include SEO-friendly descriptions, and much more! Each option can be selected from the Product Information toolbar.

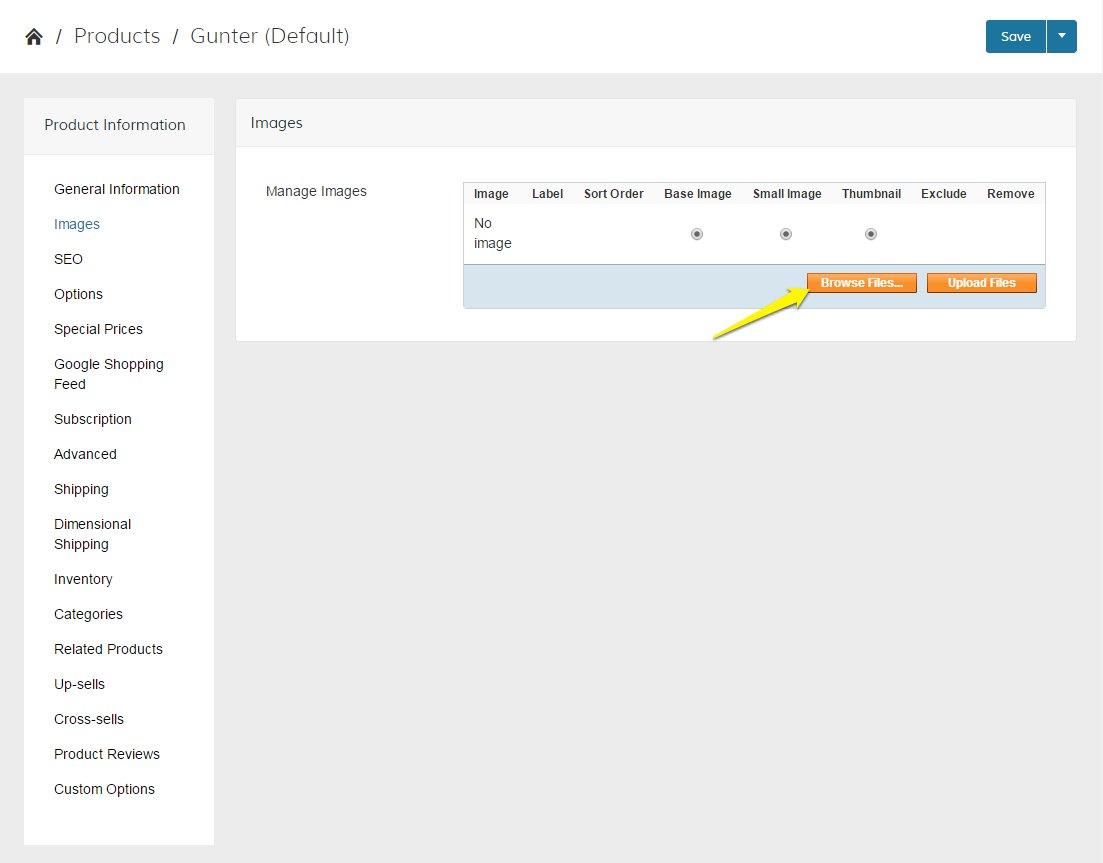
Step 7 - Add product images (optional)
Select Images from the Product Information toolbar. Then, click Browse Images... This will prompt a window that will allow you to pick an image from your computer.
After selecting the image, you will see the image file name and file size appear.
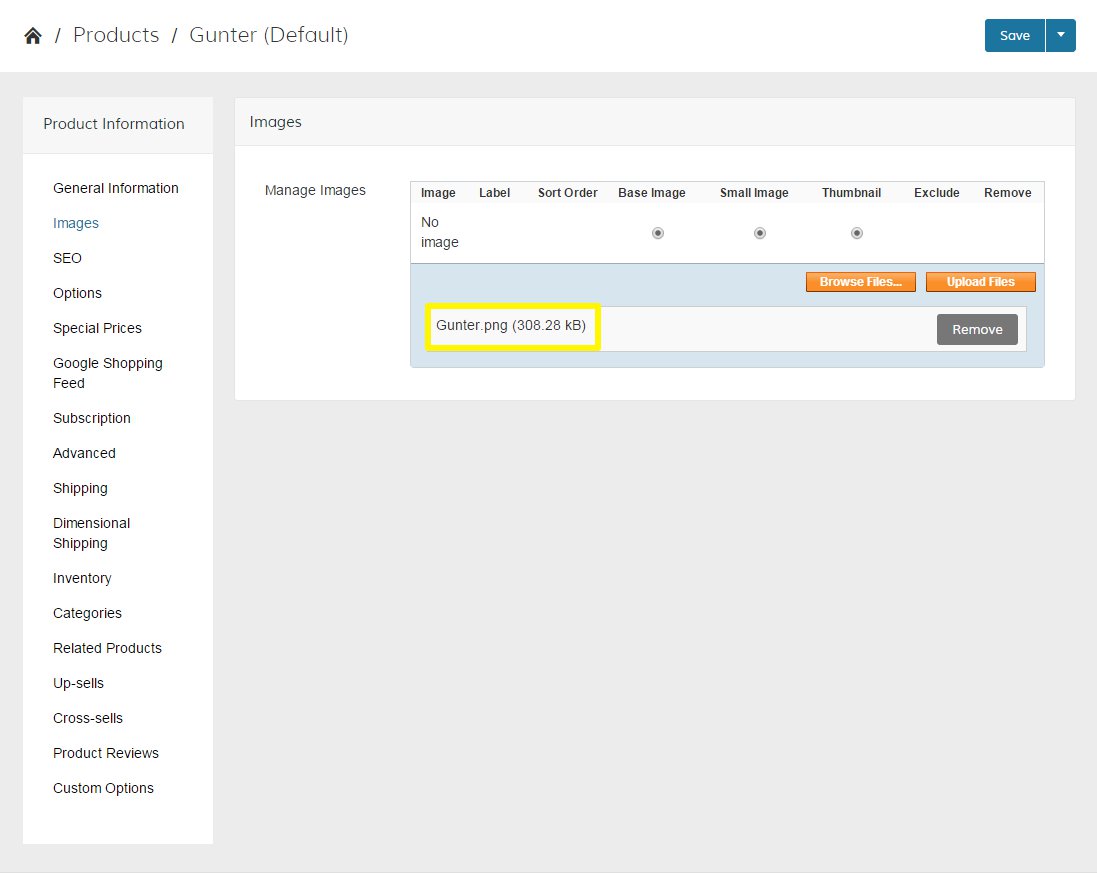
If you want to delete the image and add a different one, you can click Remove

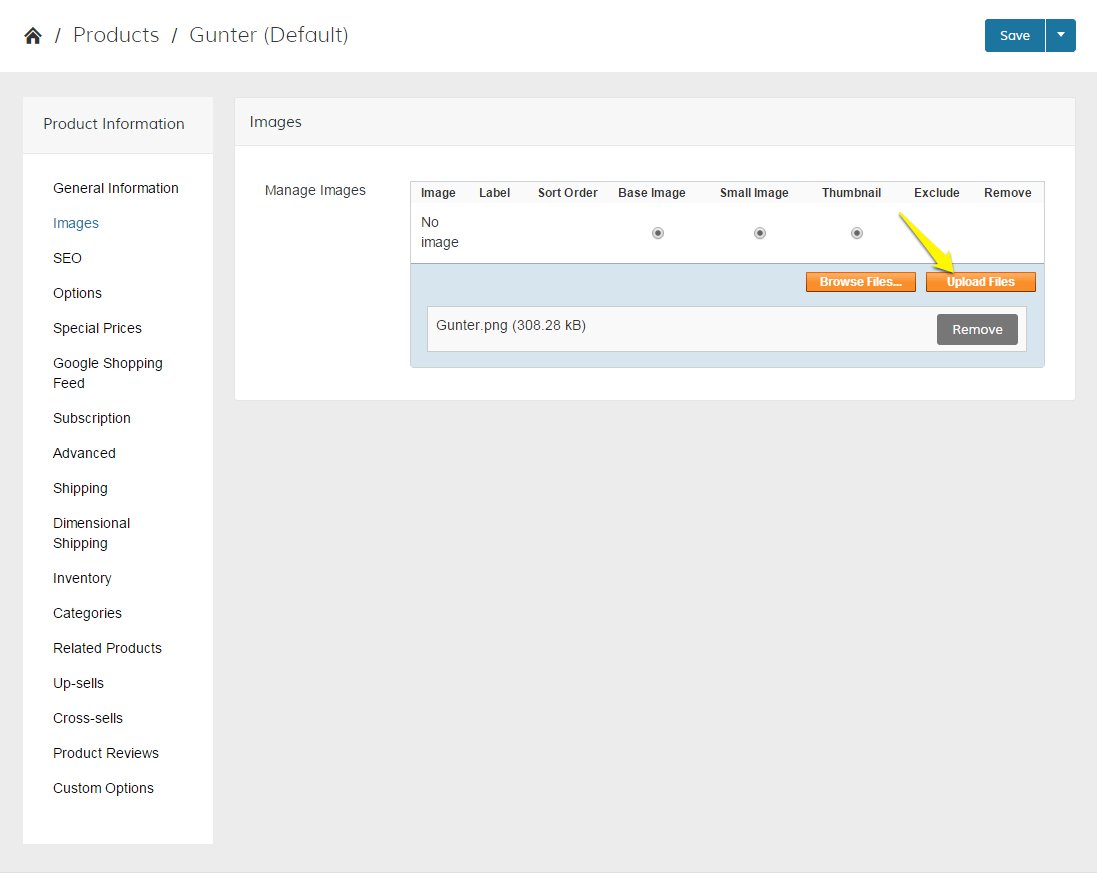
Once you're ready, click Upload Files.
You now have the option to preview your newly uploaded image by hovering your cursor over the Roll Over for Preview icon.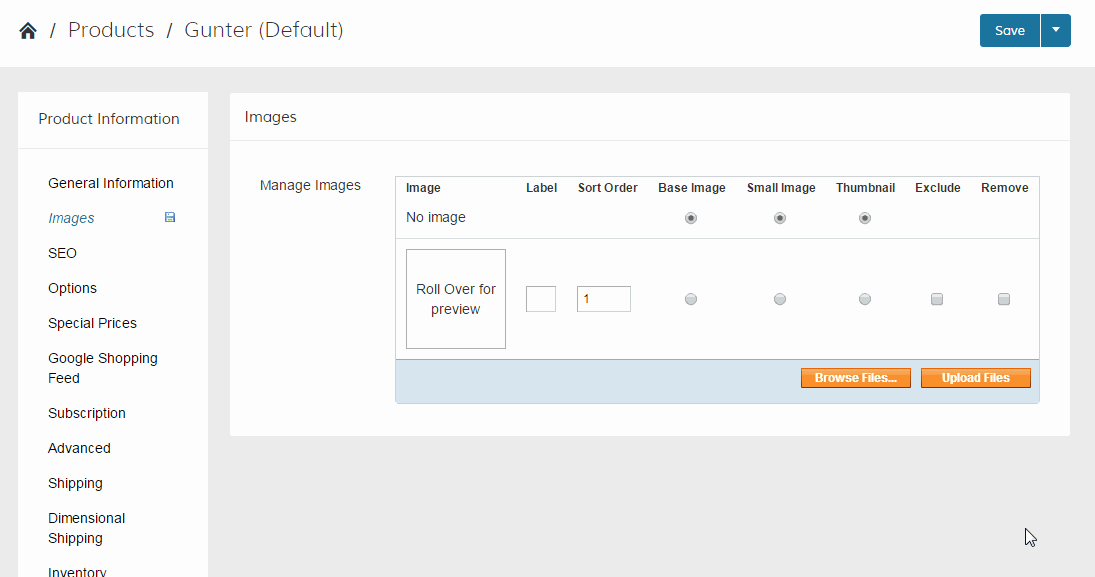
Comments
0 comments
Please sign in to leave a comment.