
Please note this tutorial is only for our older Classic design themes and tools. For information on our new themes and how to use the updated tools, please see: Starting with Design and Advanced Design Tools.
You can add menu links as standalone items in your navigation, or you can use our URL Redirect tool to create a dropdown and have all the organizational flexibility you would with categories. If you only need to add an individual link to your navigation without a dropdown, we explain how to do this here.
Step 1: Create a Subcategory
Note: If you already created your store's categories, this process is going to be similar. The categories being created for your menu links will not need products, description or any other design options.
- On the Control Panel, select Products > Categories.
- In the Categories panel on the left, click the Add Subcategory button. Then, do the following:
- Enter a Name for the subcategory, as you want it to appear in the main menu.
- Set Is Active to “Yes.”
- Assign a URL Key to the category. The URL keys of the category and linked page cannot be the same. If the page URL key you want to use is “blog”, then make the category URL key “blog2”.
- Set Include in Navigation Menu to “Yes.”
- In the category tree on the left, drag the new subcategory to the position where you want it to appear in the menu.
- In the upper-right corner, click the Save Category button.
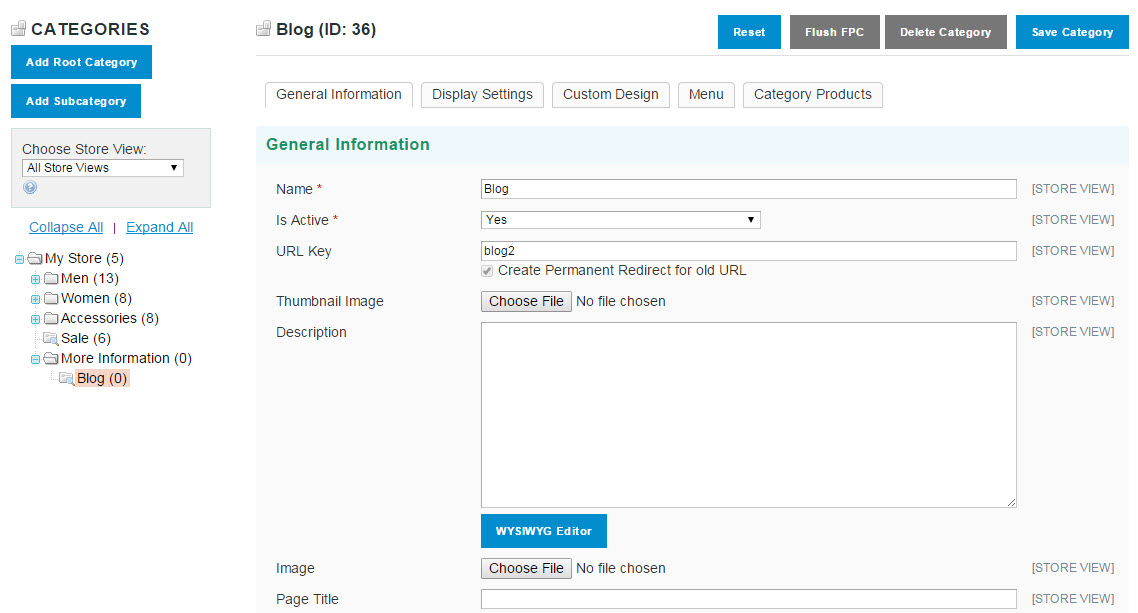
Newly Added Subcategory
Step 2: Create a Redirect
Zoey has already created an entry in the URL Rewrite list for the subcategory you created. (If your store has additional views, there will be a separate entry for each.) In this step, you will create an additional redirect that links the subcategory to a specific page.
- On the Control Panel, select Advanced > URL Rewrite.
- In the list, find the entry for the subcategory you created. Since we just made the subcategory, it should be right at the top of the list.
If you can’t find it do the following:
Click Enable Filters to start your search.
In the filter box at the top of the Request Path column, type the URL key for the subcategory you created, and click the Search button. In this example, the Request Path is “blog2”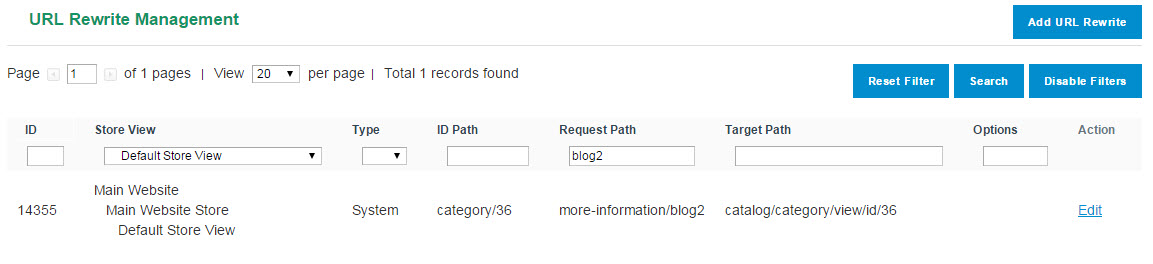
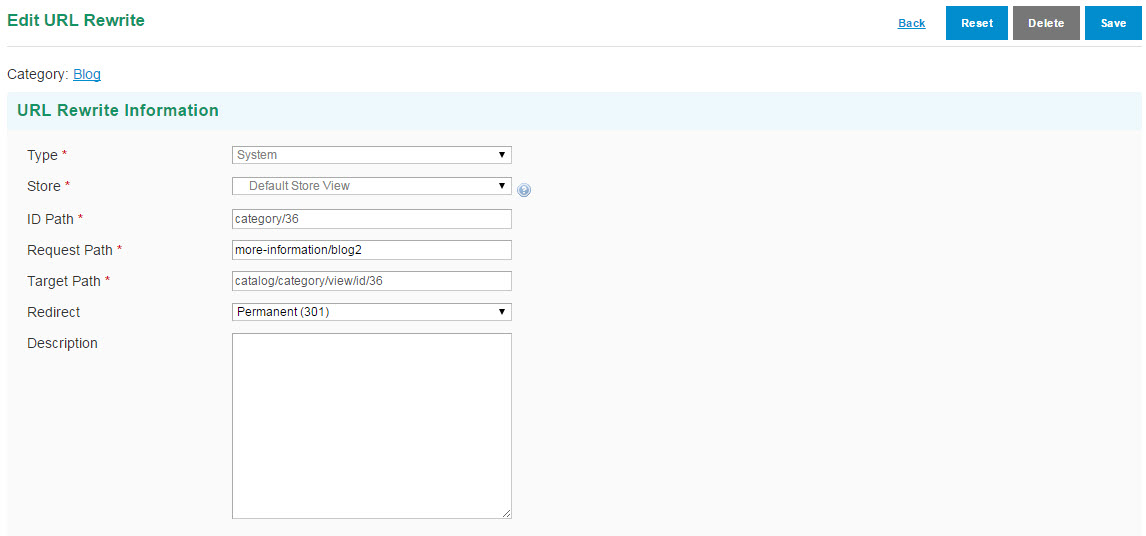
- Open the record, and drag to select the Target Path, and copy it to your clipboard.
- Set Redirect to “Permanent (301).”
- When complete, click the Save button.
- In the upper-right corner of the URL Rewrite Management page, click the Add URL Rewrite button.
- Set Create URL Rewrite to “Custom.”
- In the ID Path field, enter the URL key of the page to be linked. In this case, the URL key of the Contact Us page is “blog.”
- In the Request Path field, paste the Target Path that you recorded in the previous step.
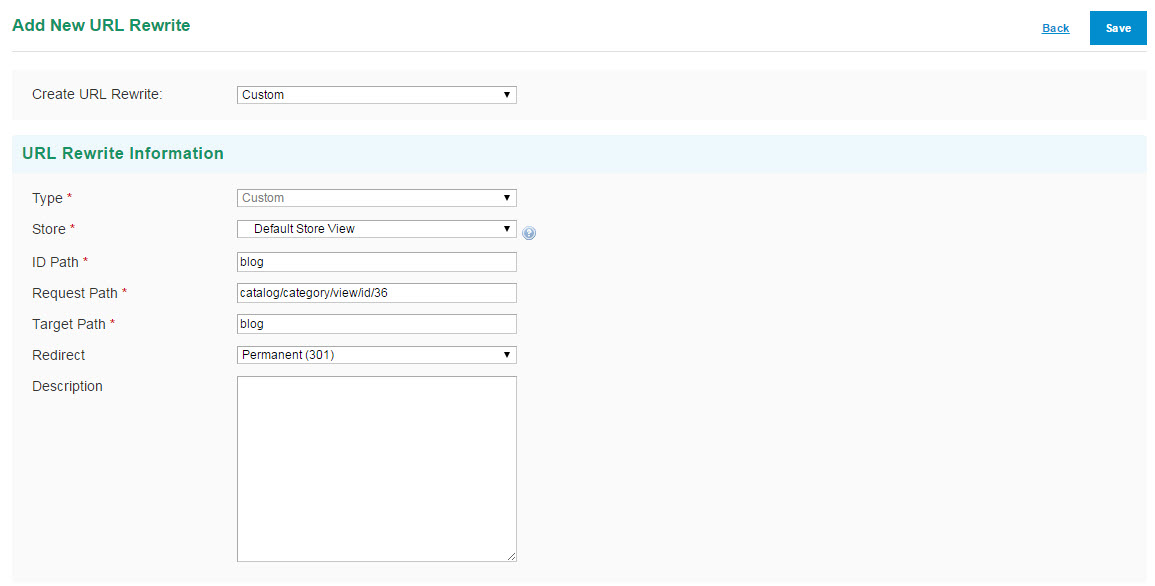
- In the Target Path field, enter the path to the new page. For example:
- contacts
(URL key of a page or product) - http://mystore.com
(Home page of store) - http://my-blog.com
(External website.)
If you are not sure what to enter for the target path, go to your storefront and look at the URL of the page you want to use. The target path is immediately after: mystore.com/.
- contacts
- Set Redirect to “Permanent (301).”
- When complete, click the Save button.
- Now we will re-index the store Advanced > Cache / Index > Index Management. Select all or only the ones related to your Catalog and URLs.
- Refresh your store from Advanced > Refresh Your Store.
- Finally, go to the home page of your store, and click the link to make sure that it works correctly.
Comments
0 comments
Please sign in to leave a comment.