
If you've looked into Table Rate Shipping and decided this is the one for you, but you want to add on additional service levels like Express, Overnight, or Ground, it's time to move into Matrix Rates!
You can find a lot of the information and documentation on which methods and rules to use by viewing the Table Rates Tutorial. Once you're comfortable with this concept, come back to this one to get started.
Step 1 - Configure your settings
- In your Control Panel, go to Set-up > Shipping. If Matrix Rates is not shown, click on Add Shipping Method, choose the Matrix Rates box, and click Click the Add Shipping Methods bar that appears at the bottom of your page.
- Click on Set-Up next to the Matrix Rates section to view your configuration settings
- Change Enabled for Checkout to Yes
- In the Title Field, enter a name that will be used to refer to this shipping option during checkout (example: Recommended Shipping).
- Choose the conditions your rates will be based off of:
- Weight vs Destination
- Price vs. Destination
- # of Items vs Destination - If you are planning to use Numerical Zipcodes in your rules, set Use Numeric Zipcode Ranges to Yes.
If you are using Zipcodes / Post Codes that include letters or are just not using these for your rules, leave this as No. - Are you offering Free Shipping over a certain monetary amount? Set Free Shipping Promotions to Enable.
- If customers who spend over your specified amount will not be given additional options such as express shipping, you can change Only Display Free Shipping to Yes.
- Set the text you will have for the free shipping in Free Shipping Display Text.
- Set how much a customer needs to spend before they are eligible for free shipping in Minimum Order Amount For Free Shipping. This should be a numerical amount with no currency symbols.
- If you have items that are given free shipping through a promotion, you can choose to Include Free Shipping Items in Rate Calculation by setting it to Yes. This will add the items to the quantity, weight or price that your Matrix is set on.
- If you are using # of Items or Price vs. Destination to determine the shipping cost, you can choose to Include Virtual Products in Price Calculation. The prices for these items will be added to those that are being shipped and used in the calculations.
- The handling fee is optional and appears as an additional charge that is added to the shipping cost. In the Calculate Handling Fee list, select the method you want to use to calculate handling fees:
- Fixed: Certain amount per order regardless of size
- Percent: Percentage of the order total price - In the Handling Fee field, enter either a fixed amount or percentage, depending on which you selected in the Calculate Handling Fee field. These values should be a number, no currency ($) or percentage (%) symbols
- Set Ship to Applicable Countries to one of the following:
- All Allowed Countries
- Specific Countries
Remember, any countries you allow this rate to be used for either must be specified in your CSV or use * for all unspecified countries. - Edit the Displayed Error Message as needed. This message appears when a selected method is unavailable.
- In the Sort Order field, type a numeric value to determine the sequence in which this shipping method appears when listed with other shipping methods during checkout.
- When complete click the Save button to save your changes.
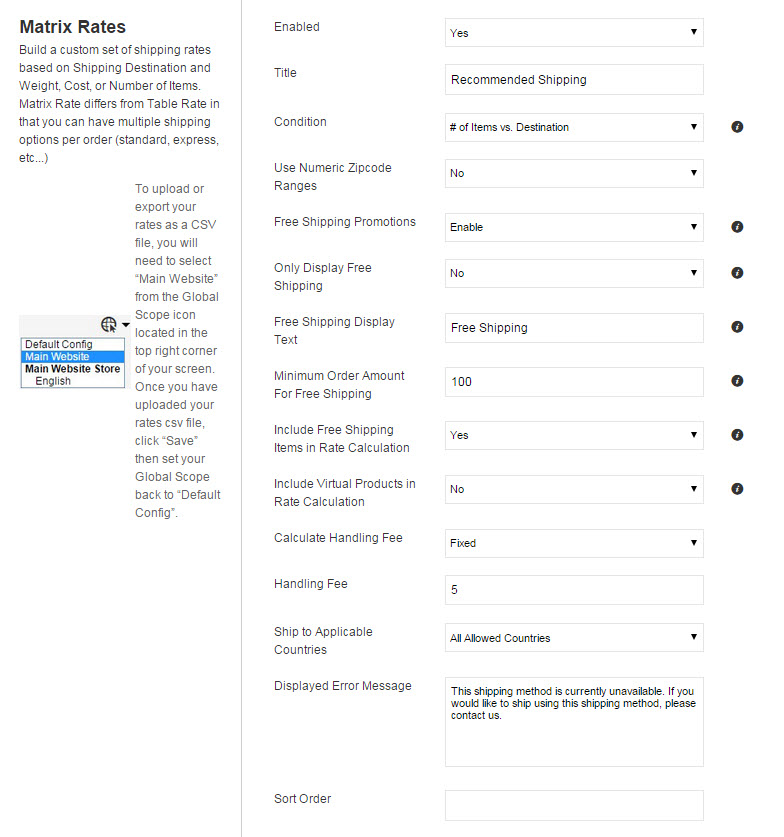
Here's an example of what this may look like once you're done
Step 2 - Configure your CSV
Once you have set up and saved your basic configuration, you are ready to change the Store Scope to the main website and work with importing or exporting your CSV.

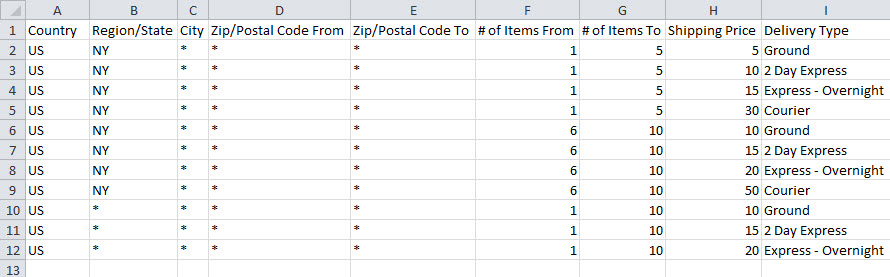
It may be easiest to start by clicking Export CSV to either download a blank template or your current rates and make your edits from there. You can learn the basics of what this sheet does and requires in the Table Rates tutorial. The only difference is we now have a column called "Delivery Type". This will allow you to have the multiple delivery types (such as ground, express, courier...) with different prices but the same rules will apply.
Here's an example of rules ready to import:
Remember this file must be saved and uploaded as a Windows CSV file. xls or Mac CSV files will not be recognized by the system and will not properly save.
Comments
0 comments
Please sign in to leave a comment.