
Now that you have Uploaded your new Products via CSV, you probably want some images to go with them! Just like with manual product creation, you need to build the product before you associate the image. SKUs will be required for this Import.
Step 1 - Upload your Images
- From your Control Panel, navigate to Advanced > Import & Export
- Locate Image Import and click the Manage button.
Here is where your images will live until they are associated with their products. Once they are associated, they will live with the products themselves. - Upload your images in one of two ways:
- Click Upload Files on the top right corner to view your computer folders and select the images
- Drag and Drop the images from the image's folder on your computer to this page - If you would like, you can Create Subfolders using the pulldown tab next to Upload Files. We recommend completing a successful upload and import before moving onto more complicated things like the subfolders.
Please note, using folder names with special characters or spaces has caused issues for image association in the past. We recommend using - instead of a space, and spelling out "and" rather than using "&"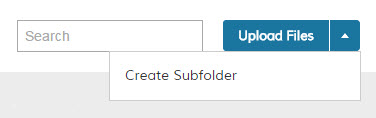
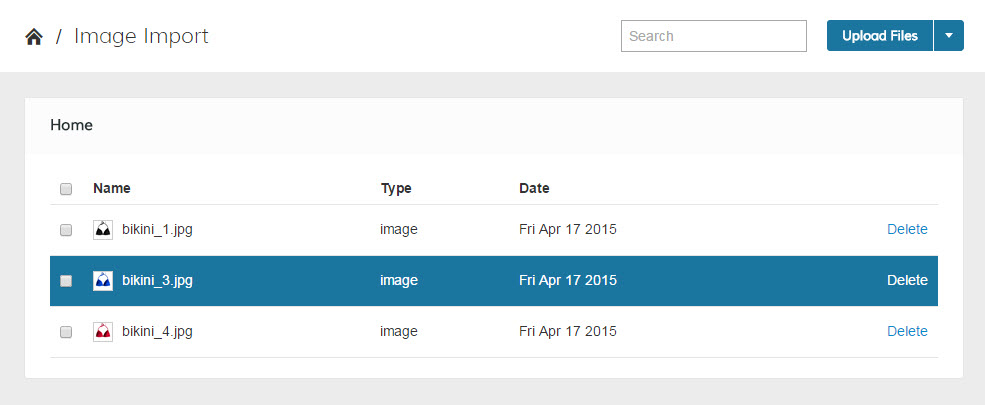
- You should now see your uploaded images, file names and have the option to delete. You can also click on the image to preview and find the File Path.
Step 2 - Format your CSV file
If you did an Assisted Image Import, this will look familiar! We now need to tell your control panel which images go to which SKUs and how to arrange them.

The following attributes can be used as columns:
- sku - this is a required attribute. Without a SKU the images will not have a place to move to. This SKU must already be in your Products List, either through a CSV Upload or manual creation
- image - This will be your Base Image, the main one that displays on the Products Page.
- small_image - Assign this image as your Small Image
- thumbnail - Assign this as your Thumbnail
- _media_image - Use this to assign multiple images to your product to show various views. These will appear as thumbnails on the Products Page
- _media_position - Use this to assign positions to your additional images. 1 will show first, followed by 2, then 3 and so on.
- _media_is_disabled - Are you using this image? If Yes, enter 0. If no, enter 1.
- _media_attribute_id - All rows must have the value 88
Now that you have these, fill out the information for each SKU. Here are some tips and tricks to get started:
- Every image file name must match the one uploaded exactly including the file path and capitalization.
- If your image file names have spaces or parenthesis in them, your store will automatically replace the space and parenthesis with an underscore. If your file was named "First product Image(1).jpg", it will now be "First_product_Image_1_.jpg" and must be listed as such in your CSV file.
- Every image name in the spreadsheet must start with a forward slash: /
Example: /image.jpg
Example: /folder/image.jpg - There should be no empty rows between SKUs. Every row must have at least one value if there is a following row being used.
- SKUs can only be entered once
- Images can only be added to one product at a time. You can add the same image to every product, you just need a new row with each SKU.
- If you are using Folders, these must also be included. In the example, the second SKU's images are a folder named Shoes2015
- As with every CSV file Zoey uses, you must save this as a Windows CSV file.
Attached to this tutorial you will find the sample csv.
Click here for the CSV Template for Image Assignment
Step 3 - Combine the two to associate images with products!
Once you have the CSV configured, you'll be ready to start associating the images with the products. We highly recommend until you are familiar with this tool to start small, and test with a small batch! Doing so will save you a lot of trouble- nothing worse than having to find an error in a massive CSV!
- Back in your control Panel, go to Advanced > Import & Export
- Click on Manage next to Import
- Select Entity Type to be Products, and Import Behavior to be Append Complex Data.
- Select File to Import by using the Choose File tool to select the CSV.
- Click Check Data in the top right hand corner
- You will be alerted of any errors in your CSV file, go back and correct these before selecting Import
- Once you have been notified the import was complete, go to Advanced > Store Refresh to see your updates on the front of store!
Trouble shooting:
Most errors come from not having the / (You'll get "file not found" or similar) or typos in the SKU (leading 0s being erased) or image name. Be sure to check over the tips and tricks in Step 2.
Don't see the Images on the front end? Go to Advanced > Cache & Index. Reindex from Index Management and Refresh from Cache Management.
If you are still having issues you can open up a support ticket or schedule a phone call with us. Please include the CSV you are using so we can check the information!
Comments
0 comments
Please sign in to leave a comment.